History Order Overview
A Sapphire Web Pack History Order is a specified and stated intention/arrangement to process a commercial or business order or transaction for selected inventory items, goods and/or services. A History Order records a buyers particular request to purchase inventory items and/or services from a vendor.
Sapphire Web Pack History Order has a very unique function to be able to load the entire history of every single inventory item the client has ever purchased from you. The user can put a limit on the history of the order i.e. three months, six months, one year, two years, etc. if required. But the beauty is, if a client regularly orders off you, this will load all the regular inventory items typically ordered, and the quantities they order, the price they pay and then it’s simply a matter of going through and modifying the quantities on each line to what they wan. The inventory items they don’t require for this particular order, we can delete and then the data entry is really elegant, quick and efficient. It’s a way of speeding uptake client order through the History Order card.
An Order will be provided by your client and this is the intention and expression requesting supply of inventory and services, which you will process as an Order Client Invoice (OCI) facilitating the process of picking, packing, manifest deliveries, label generation, boxing, freight costs, etc.
A History Order may then be linked to a Client Job Project, which would then form part of your resources and activities, and will additionally form part of your SapphireOne Gantt Calendar. Typically a History Order may in turn generate a series of Order Vendors Invoices (OVI) of your vendors for the supply of inventory and/or services. This in turn will provide at an Inventory level, all the relevant costs and revenue accordingly via Inventory items, Client and also Job Project and Job Project P&L/Income Statement.
The History Order can also be linked to your Asset Register within your SapphireOne asset at the inventory item and/or services for your client. An Order Client Invoice (OCI) also has the ability to have a weight that will automatically calculated based on the number of units that has been ordered and give a total weight by line. Due to the fact you will have predefined the weight within your inventory item, it will also identify how many inventory items in a carton and it will give you a total number of cartons. It will also do the same for pallets so will give you a total number of pallets when your client is ordering these particular inventory items on their Order Client Invoice (OCI).
In turn, not all client orders will be able to be 100% delivered. For example, in the circumstance that you can only supply 50% of your Order Client Invoice (OCI), when 50% of goods are delivered, the 50% will be converted to a Sales Client Invoice (SCI) and the remaining balance will be contained within the original Order Client Invoice (OCI), which will stay on backorder until such time as you can provide the balance of the outstanding Order Client Invoice (OCI). Alternatively, you can convert them straight to a Sales Client Invoice (SCI). This will provide at an Inventory level, all the relevant costs and revenue accordingly via Inventory items, Client and also Job Project and Job Project P&L/Income Statement.
As a user you also have the option to link a carrier to your Order Client invoice (OCI), which will automatically identify the freight or shipping company that will be delivering those goods. This will then populate through to base of manifest and the delivery runs when you’re producing your manifest. This information will automatically flow from the original Order Client Invoice (OCI).
A Sapphire Web Pack History Order is the formal process of receiving an order from a client. A formal order from the client will confirm details of the financial value and due date for a client’s requirements of Inventory. It states the total dollar value to be paid, the due date on which is the final sales client invoice can be expected, and the quantity of the product delivered.
The History Order displays the number of items ordered, deliverable now, and the number on back order. There are no Periods on Orders as they are held in the current period until they are converted to Invoices. When End of Month is run, Sapphire Web Pack will re-write the period so that all orders in Sapphire Web Pack remain in the current month or period. Orders should not be left in Sapphire Web Pack as the are continually brought into current by SapphireOne and if allowed to build up will consume system resources.
History Order is contained within the Data Entry tab Sapphire Web Pack, a user has the ability to create a History Order by selecting the History Order function.


Data Entry / History Order

Choosing the Client
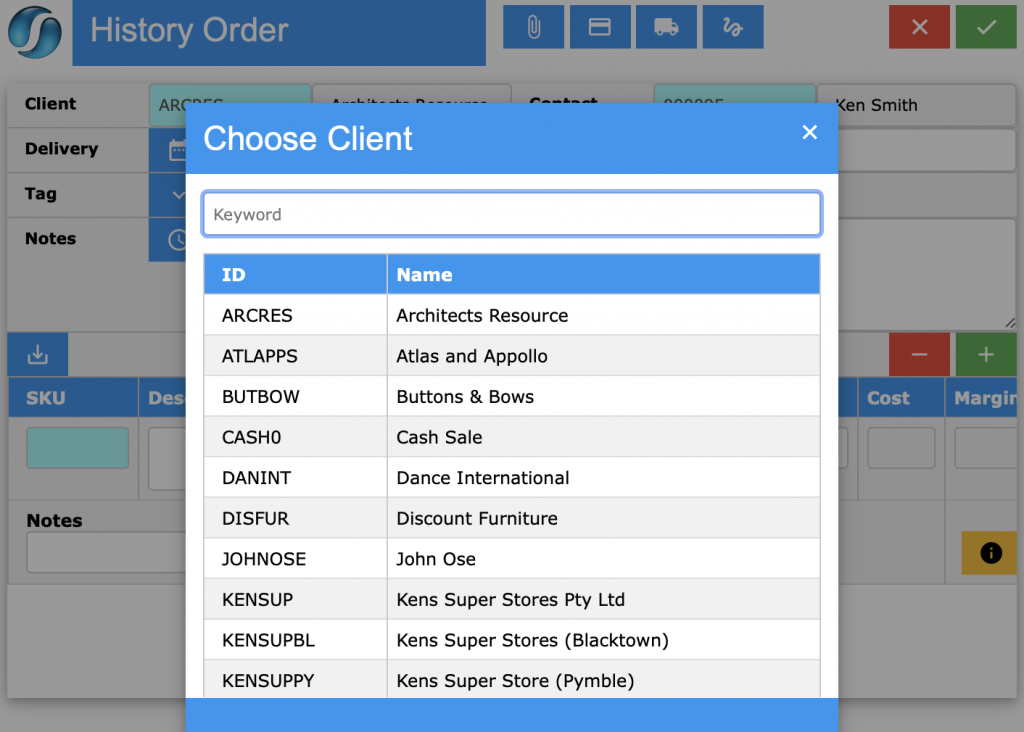
You will be presented with Choose Client, if you type nothing you will see all clients and if you type the first character of the ID it will show you a reduced list. For example, if you choose ‘A’ it will show you all the client IDs commencing with A.
When the History Order function is selected, SapphireOne will display a list of customers that are currently recorded in the data file. The list below is from the Bondi Blue demo data file.
Left mouse click directly on the Client that the order is to be created for. Alternatively, enter into the Keyword data field part of the required ID and use the @ symbol to perform a wild card search for the Client that is required.

In both cases once a valid ID is entered SapphireOne will display a new History Order screen for the selected Client ready for data entry as seen below.
Dictation and Speech to Text Overview
SapphireOne’s Dictation (MacOS) and Speech to Text (Windows) functionalities revolutionise data entry. These features are available for any data entry field and all inquiry screens within SapphireOne. For instance, when a user makes a call via the SapphireOne Softphone, SapphireOne automatically timestamps the contact and phone number. Post-call, users can dictate notes directly into the CRM contact memo field in relation to the stamp.
This functionality is applicable across all Data Entry screens. As examples, when entering a Vendor Invoice (VI), users can dictate memos directly. Similarly, additional lines can be added to the General Ledger account, with each line having a unique memo field. After an employee interview, users can efficiently dictate notes.
Speech to Text and Dictation are powerful tools that SapphireOne and its clients use daily, significantly saving time.
Icons on the History Order Screen
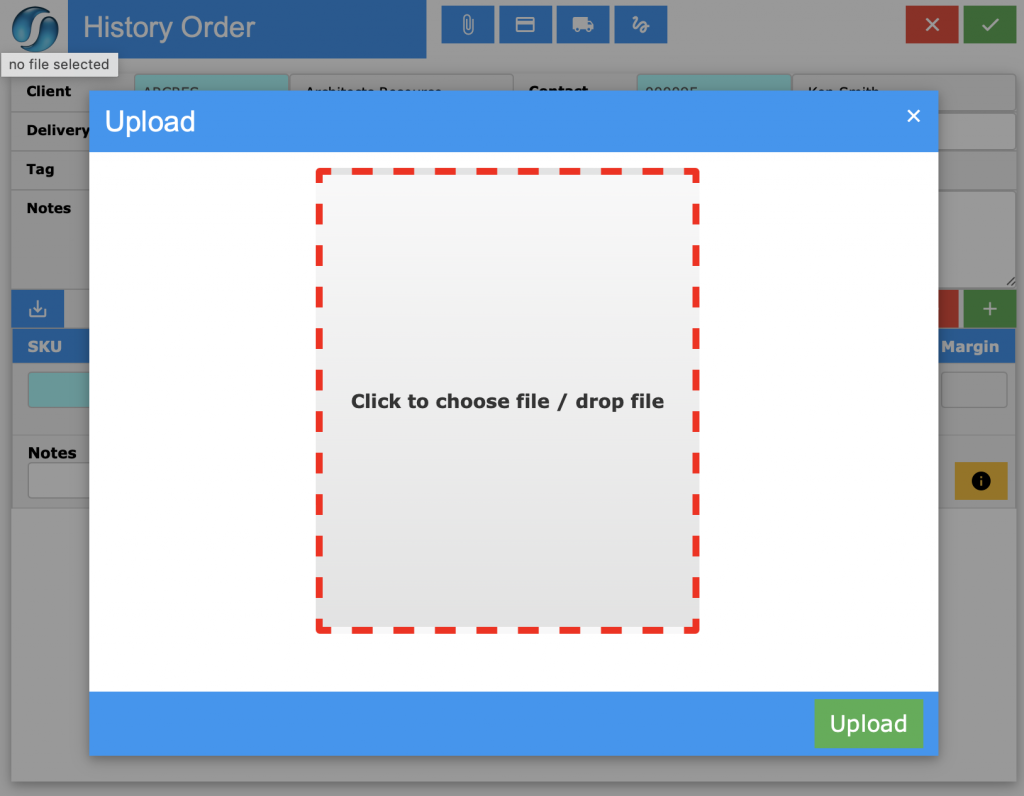
Document
- Document – This is the first icon to right of the History Order. When the
 Document icon is selected an alert will be displayed allowing the user to view existing documents attached to the client record.
 - Upload – To upload the selected document the Sapphire Web Pack user must then select the
 button to complete the task.
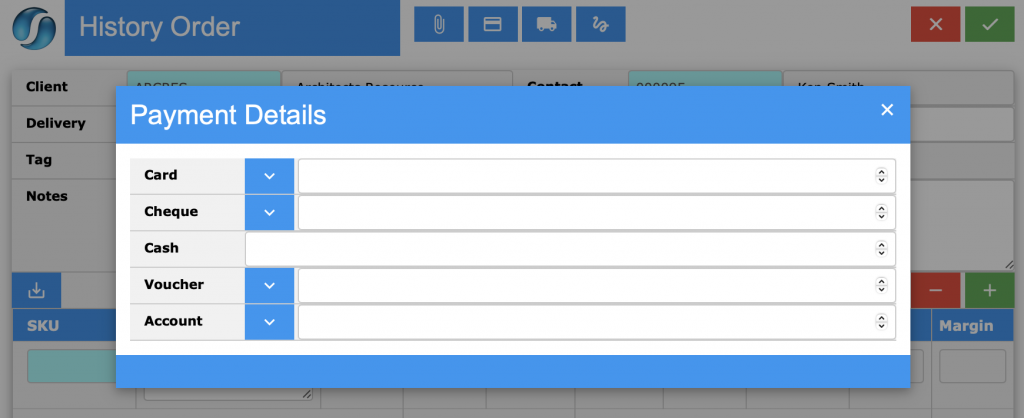
Payment Details

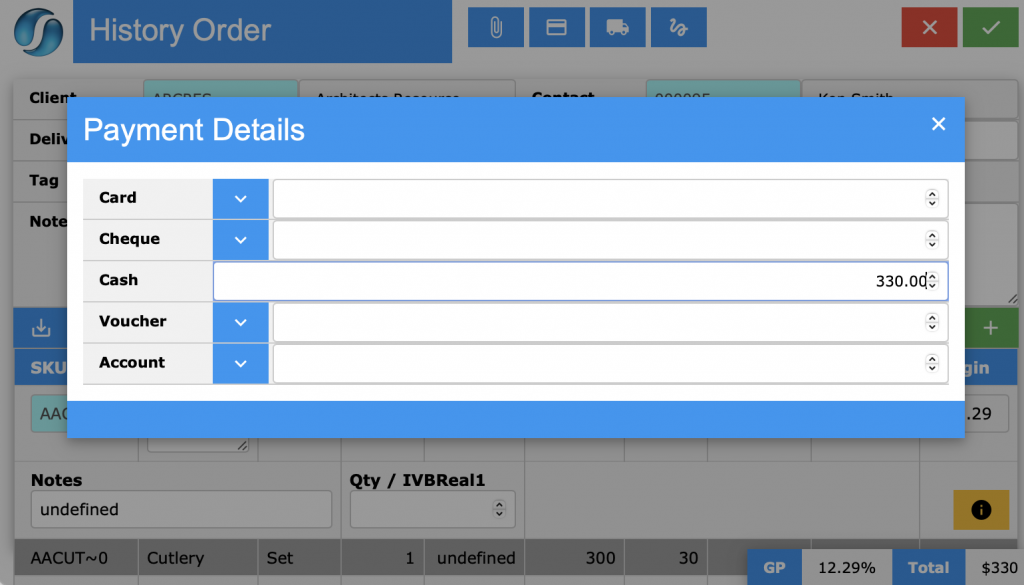
Client Receipt – Select the Payment Details icon to create a Receipt for the Client History Order on Sapphire Web Pack. Sapphire Web Pack will display a screen ready to receive the required details for the receipt as seen below titled Payment Details. You are presented with five options – Card denoting Credit Card, Cheque, Cash, Voucher, Account. Each one of the five, once selected will present additional data entry fields that are required for the use of the selected payment option..
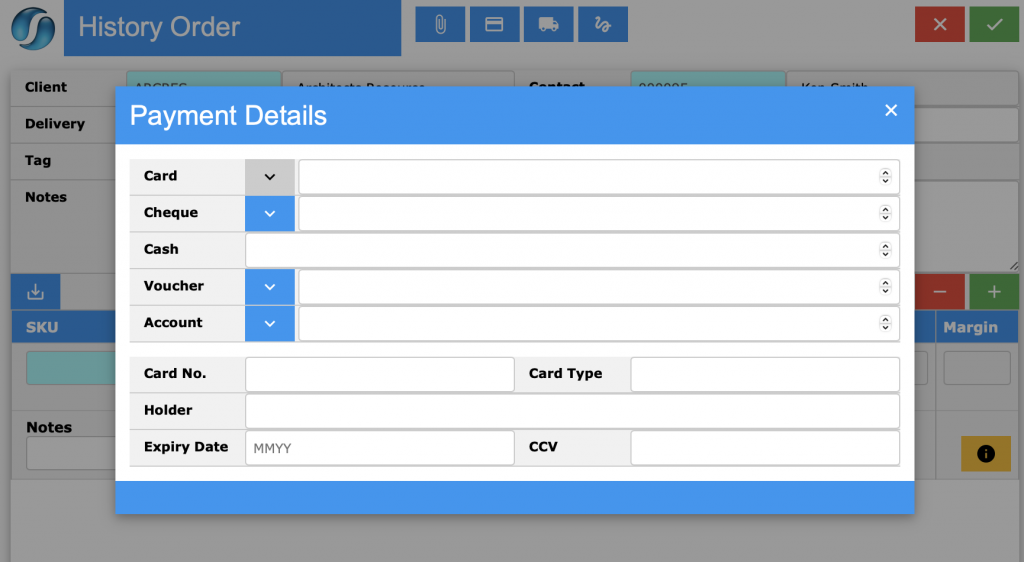
Card Payment Option
Cheque Payment Option

Cash Payment Option
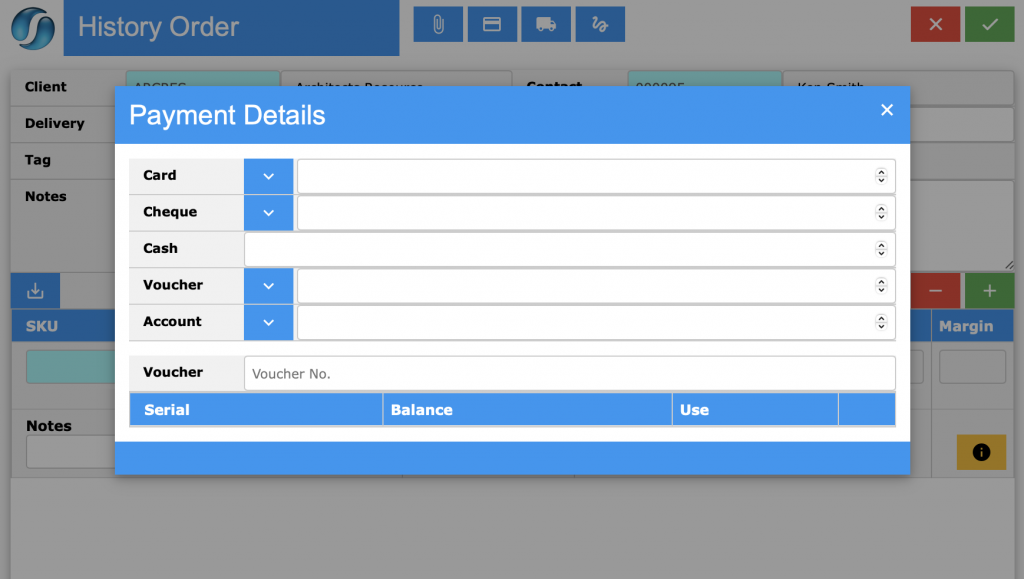
Voucher Payment Option
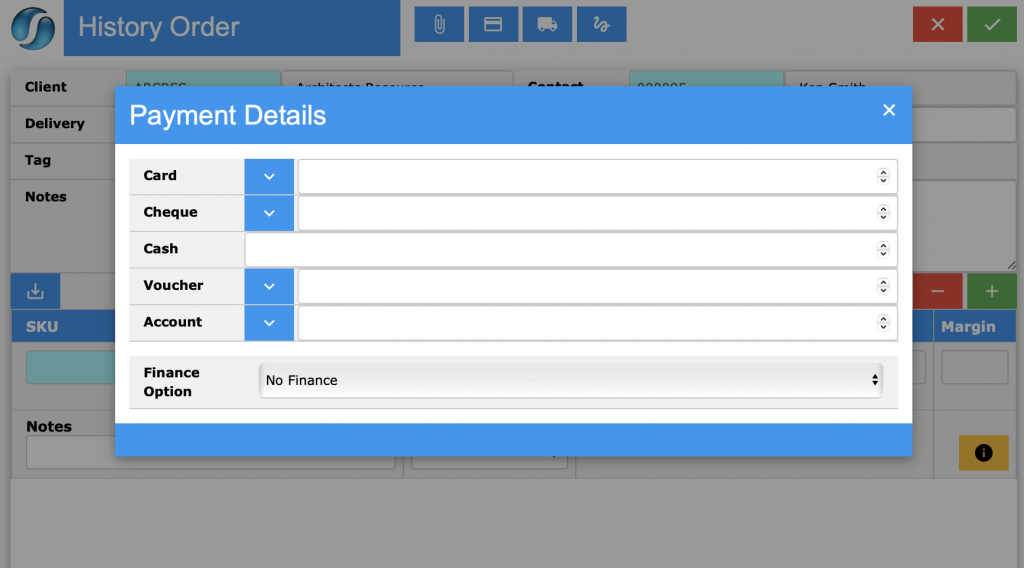
Finance Payment Option
The Client ID, Date In and Type are all drawn from the Clients master file as is the Paid To Bank Account.
- Saving – Once the total is entered select the Tick
 icon to complete processing the receipt.
 - Cancel – Select the Cancel
 icon which will cancel the current operation and return the user to the History Order screen.
Delivery

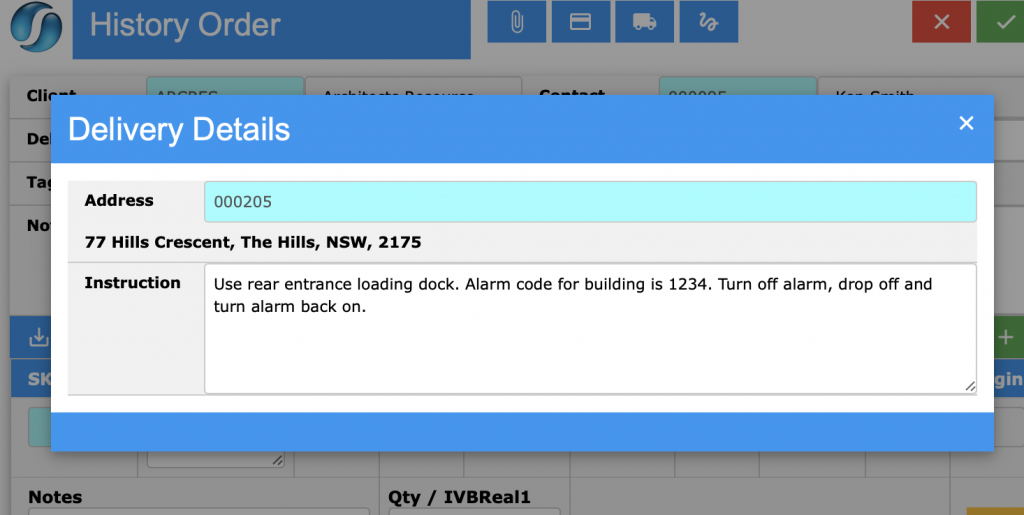
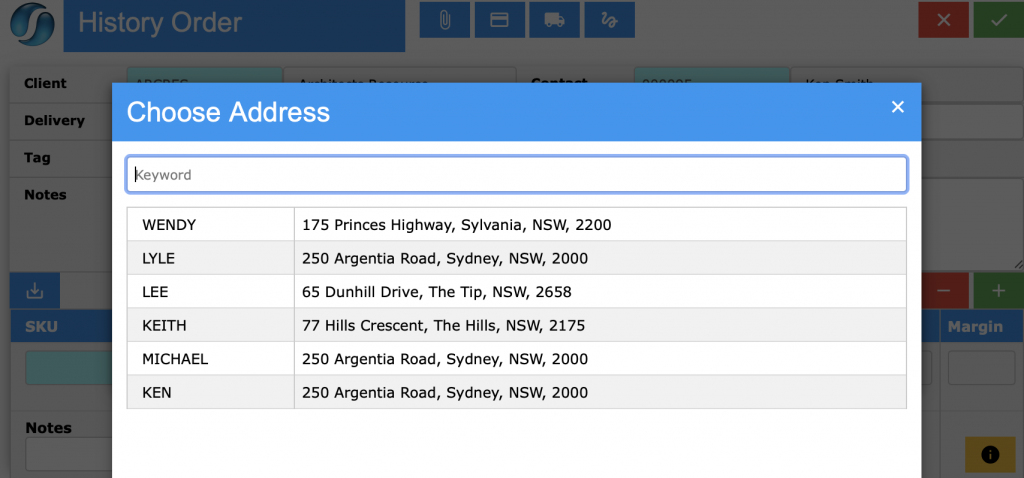
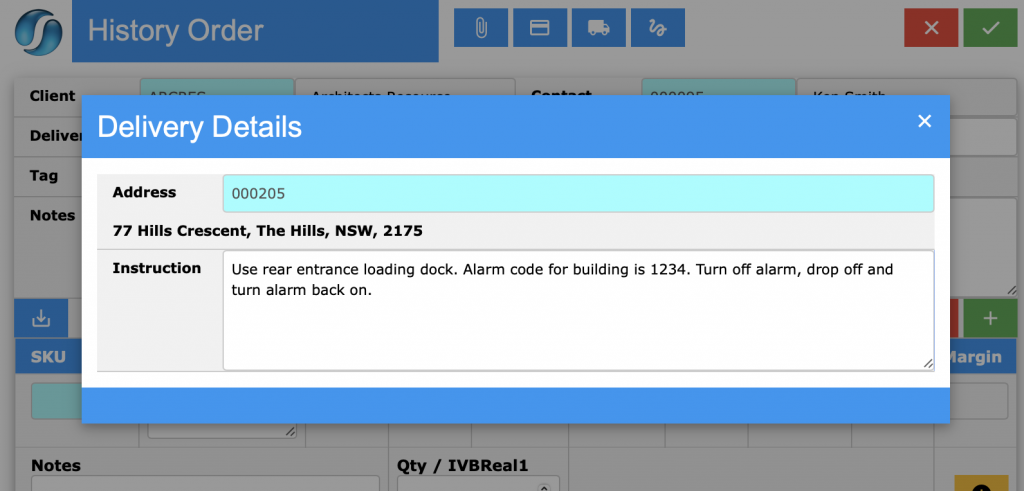
By selecting the Delivery ![]() icon within the Sapphire Web Pack History Order, the user will be prompted to select an address where they would like the delivery to go. By clicking on the blue address bar as seen in the screen shot below with 000205 ID.
icon within the Sapphire Web Pack History Order, the user will be prompted to select an address where they would like the delivery to go. By clicking on the blue address bar as seen in the screen shot below with 000205 ID.
If multiple addresses have been set up on the SapphireOne Client, you will be presented with a list of all the addresses entered for the Client. By clicking on a particular address, SapphireOne will then enter it as the delivery address for you.
Instructions
If the delivery instructions are already set up in the SapphireOne Client, it will automatically populate the Instruction area. The user has the ability to leave these as they are when entered, or alter them as required.
Signature

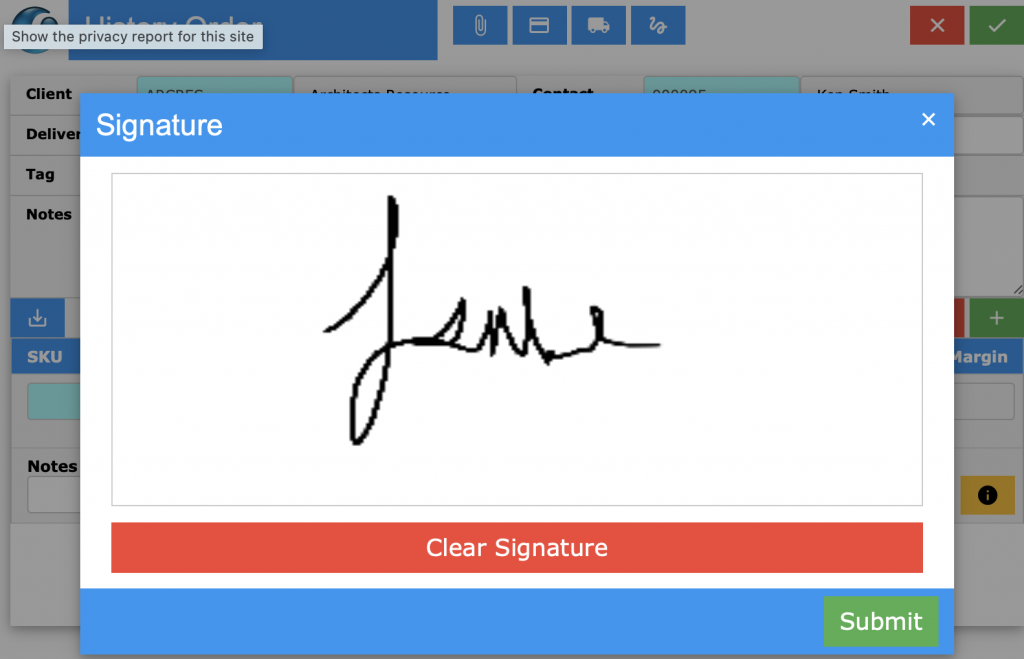
Select the ![]() signature icon to create a signature and confirmation for the Client History Order Sapphire Web Pack. This can be performed via any device, iPhone and iPad, and it has the capability of running on any browser running HTML5 or greater.
signature icon to create a signature and confirmation for the Client History Order Sapphire Web Pack. This can be performed via any device, iPhone and iPad, and it has the capability of running on any browser running HTML5 or greater.
Saving / Cancelling the History Order
- Saving – Once the total is entered select the
 Tick icon to complete processing the order.
 - Cancel _ Select the
 Cancel icon, which will cancel the current operation and return the user to the History Order screen without saving the transaction.
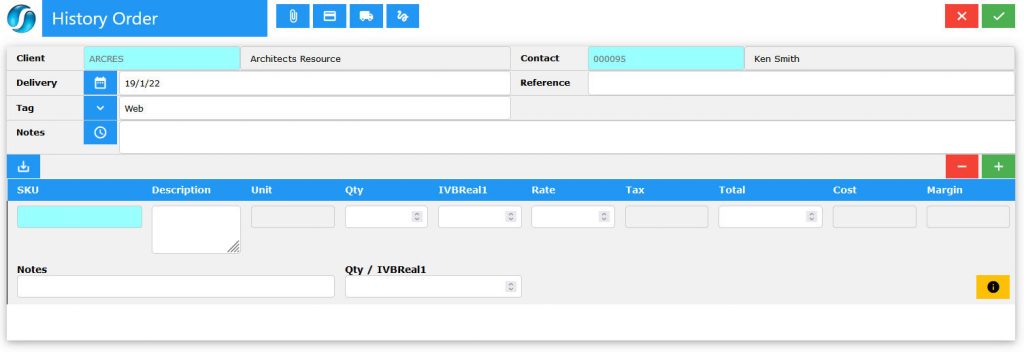
Entering the History Order Sapphire Web Pack
The user will note that there is provision for the entering of some additional Client based data into this History Order while the line entry area is very similar to an Order in Client Server mode.

Client Area
- Client ID – Entered by SapphireOne from the user selection made for a Client. This box will automatically appear when starting a new History Order or alternatively the user can amend/change the Client by clicking within the blue box of the client. The user has the ability to and it will automatically bring up a reduced list, for example, if you type in an ‘A’ it will bring up all clients starting with ‘A’ or alternatively you can click tab and select from the list.
Contact – Entered by SapphireOne from the user selection made for a Contact. This box will automatically fill the first Contact for this particular client when starting a new History Order or alternatively the user can amend/change the Contact by clicking within the blue box of the Contact. The user has the ability to and it will automatically bring up a list of all contacts for that client. For example, if you type in an ‘A’ it will bring up all clients starting with ‘A’ or, alternatively, you can click tab and select from the list.

Reference – In the History Order function the user may enter in an External Reference number if required. This is a free form field, for example, the user can add the client order number, a reference you wish to keep a record of or any additional information you want to add to the History Order.
Tag – SapphireOne by default enters a tag of Web when a web based transaction is saved to the data file. This may be altered if required. For example, if you use the word Hold in this tag, SapphireOne will automatically put the transaction on hold preventing it from being posted. To allow posting, this tag must be altered to something other than hold.
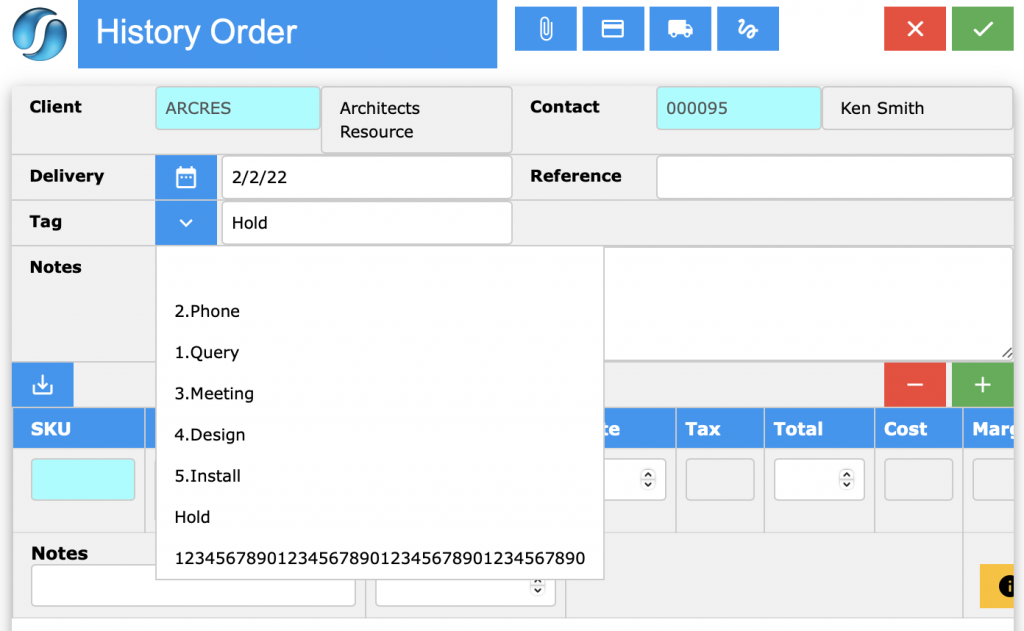
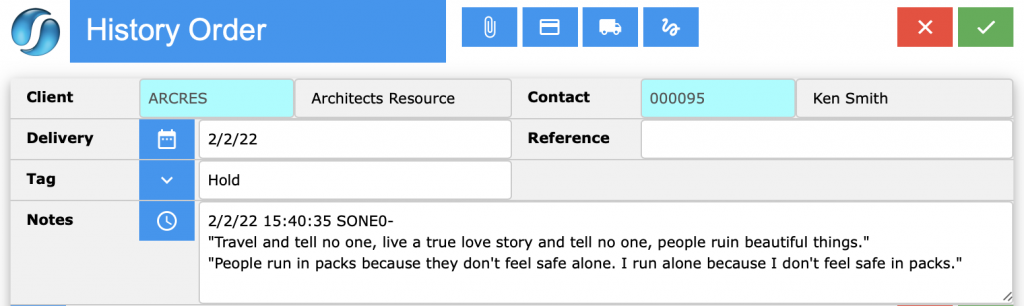
Notes – By clicking on the Clock icon this will automatically date and time stamp the notes field and allows the user to enter their own notes.
Load History

Load History, when selected, will automatically load all inventory line items that customers have previously purchased from you and this will load as blank quantities. Then the user can either elect to add quantities to each line or remove lines.
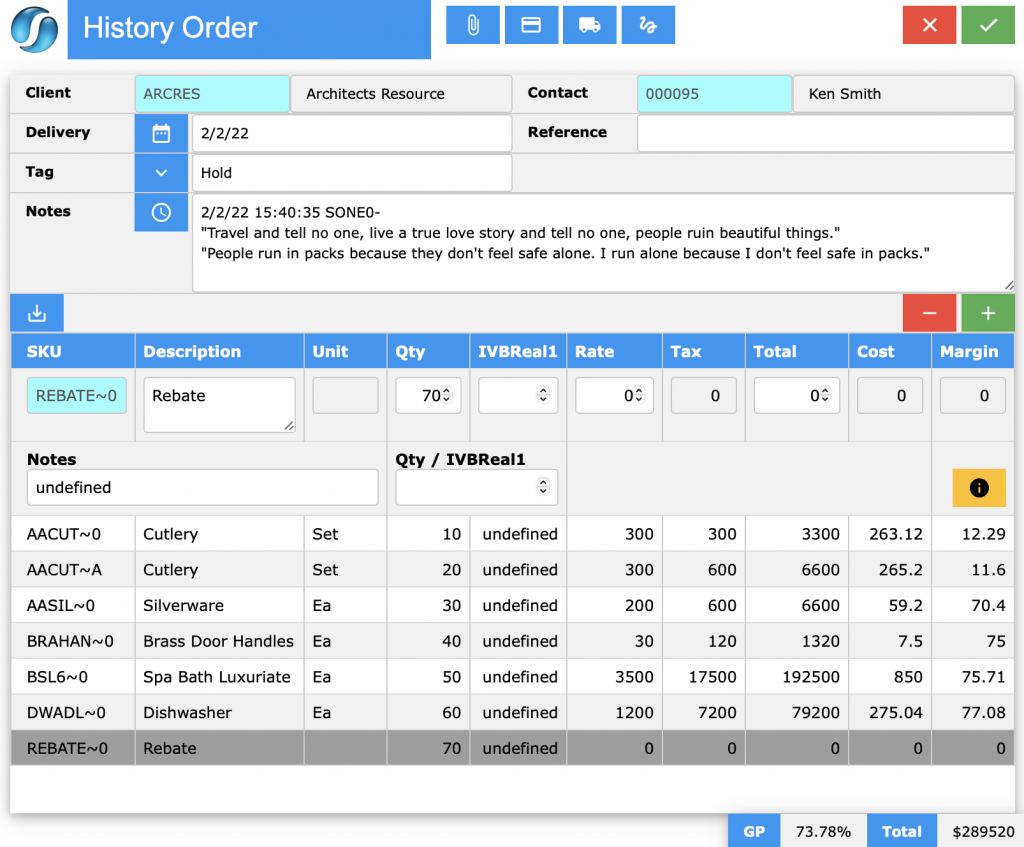
Line Entry Area
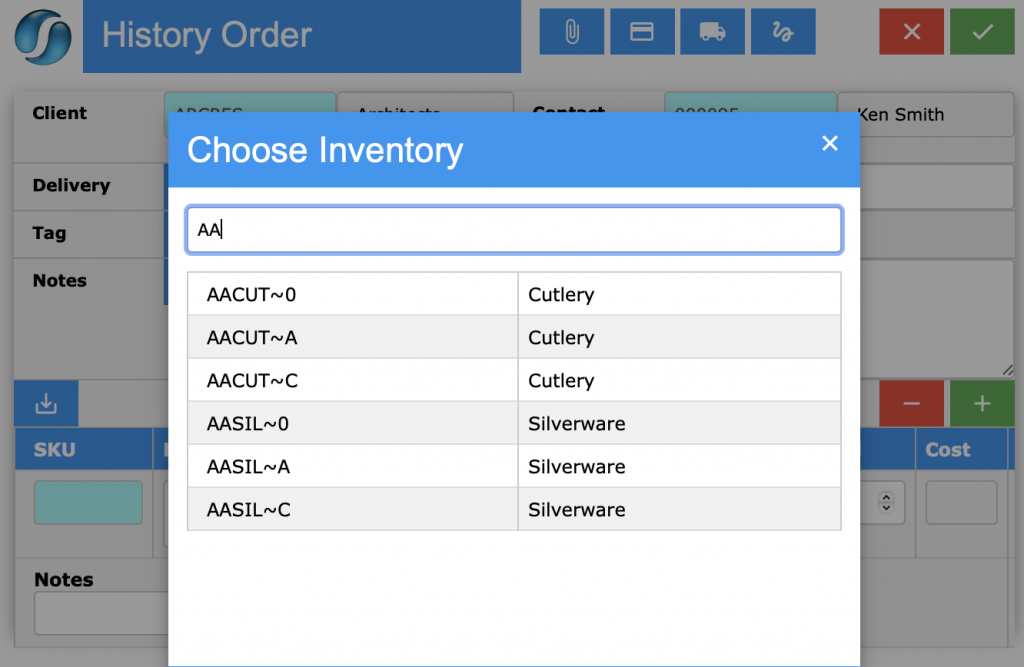
Inventory Item – Left mouse click directly on the SKU or ID field in the line entry area. A complete list of inventory items will be displayed for the user to select from.
This box will automatically fill the first Inventory for this particular client or alternatively the user can amend/change the Inventory by clicking within the blue box of the SKU. The user has the ability to and it will automatically bring up a list of all Inventory for that client. For example, if you type in an ‘AA’ it will bring up all Inventory starting with ‘AA’ or, alternatively, you can click tab and select from the list. If you are using an iPad or iPhone, or a hand held device, you can use a bluetooth barcode scanner and it will automatically fill in the Inventory ID.
Alternatively enter enter into the Keyword data field part of the required SKU or ID and use the @ symbol to perform a wild card search for the Inventory Item that is required.
In both cases once a valid ID is entered SapphireOne will enter an ID into the SKU data field for the line in the History Order.
- Quantity – Enter in a quantity for this line in the order.
- IVBReal1 – Custom data entry field. It may be used as required.
- Rate – The rate should be left as it is but can be altered as required.
- Tax – Tax is calculated by SapphireOne.
- Total – The total is Calculated by SapphireOne based on the Qty and the Rate.
- Cost – Cost is calculated by SapphireOne based on the purchase and sell prices.
- Margin – This is calculated by SapphireOne and will alter if the Rate is altered allowing the user to see the margin on a line by line basis.
- Notes – Notes may be added to each inventory item on a line by line basis.
Information Icon

When the Information icon is selected SapphireOne will display additional information about the currently selected Inventory Item. It shows all locations stock is available, what is currently on back order and what is currently ordered by location. It shows the Inventory Class Information, Unit Information, Type of Inventory Item, UPC, standard Price, Next Delivery, Width, Height, Weight, Carton Quantity, Margin Percentage, GP and Notes.

- Adding Lines – Select the
 Add Line button to add an additional line to the transaction.
 - Deleting Lines – Select the
 Delete Line button to remove a line from the transaction.
GP and Total

- GP – The Gross Profit for the invoice as a whole is displayed here as a percentage.
- Total – The Total amount for the invoice is displayed here.
You can review our Blog and YouTube channel for additional information and resources on SapphireOne ERP, CRM and Business Accounting software.